

We woke up the Paragons of the Klaxxi, and now we’re putting them to rest
| Siege of Orgrimmar |
| Vale of Eternal Sorrows |
| Immerseus |
| The Fallen Protectors |
| Norushen |
| Sha of Pride |
| Gates of Retribution |
| Galakras |
| Iron Juggernaut |
| Kor’kron Dark Shaman |
| General Nazgrim |
| The Underhold |
| Malkorok |
| Spoils of Pandaria |
| Thok the Bloodthirsty |
| Downfall |
| Siegecrafter Blackfuse |
| Paragons of the Klaxxi |
| Garrosh Hellscream |
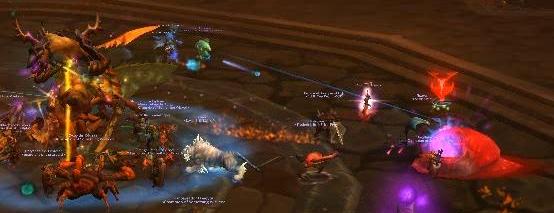
Paragons of the Klaxxi is the 13th and penultimate encounter in the Siege of Orgrimmar raid, and bear with me, folks, this is gonna be a long one.
I guess if you read your quest text while you were levelling in the Dread Wastes, you’d already know that these daily-quest-giving bugs told you straight-up that they were going to align with anyone who chose the Old Gods. Now you can exact your revenge for that terrible first week of Dread Amber Shard-farming, rep-grinding awfulness!
In this encounter, players will face all nine of the Klaxxi Paragons, although only three are active at any time. As you kill one, the other two active Paragons heal to full, and a new Paragon joins the battle. Fortunately, the order in which the Paragons join the battle is pre-determined, despite what the dungeon journal may say, so you only need to learn one sequence of Klaxxi abilities to be able to complete the fight.
You begin the fight with Hisek the Swarmkeeper, Rik’kal the Dissector, and Skeer the Bloodseeker active. The others join the fight in the following order:
- Ka’roz the Locust
- Korven the Prime
- Iyyokuk the Lucid
- Xaril the Poisoned Mind
- Kaz’tik the Manipulator
- Kil’ruk the Wind-Reaver
Each boss has several mechanics that must be dealt with, and there are a few combinations that are particularly difficult. For example, Hisek’s Aim ability can be very challenging while Ka’roz is active and using his Hurl Amber ability, and leaving Iyyokuk and Xaril alive together for an extended period of time will certainly tax your healers’ mana bars. I’ll be recommending my favourite kill order in the Strategy Summary at the end of this article, but I’d invite all of you to post your opinions, because what’s difficult for one raid isn’t necessarily going to be difficult for another!
The damage pattern – and thus the healing requirements – for this fight varies greatly depending on what kill order your raid uses and how quickly your raid is able to defeat the most dangerous Paragons. I’d recommend gearing and choosing Talents for a heavy-movement, spread-out fight, but your raid’s strategy should inform your spec choices here.

Paragon’s Purpose heals remaining Paragons to full
As I mentioned above, killing a Paragon will cause the other two Paragons to heal to full health and gain a stack of Paragon’s Purpose, increasing their damage dealt by 10%. This means that most Paragons you will fight will have at least 2 stacks of Paragon’s Purpose by the time you are killing them. While it may seem intuitive to kill whichever Paragon has the most stacks first, some Paragons are scarier than others, and you may wish to avoid allowing the scariest Paragons to gain any stacks of the buff, by killing them when they land.
Additionally, every Klaxxi that dies leaves behind a buff for one player in your raid to obtain, and while none of these buffs are required to defeat the Paragons, they certainly do help. I’ll discuss these buffs in the Power of the Paragons section, but first, I’ll cover each boss’s abilities.
Hisek the Swarmkeeper does not need to be tanked. In lieu of an auto-attack or any melee damage, he will cast Multi-Shot approximately every 6 seconds, dealing moderate Physical damage to random raid members (excluding tanks; 3 targets in 10-player raids and 5 targets in 25-player raids).

Aim knocks its target back to a distance of 45 yards from Hisek
About thirty seconds after the fight begins, Hisek will use his only other ability, Aim. Aim chooses a random target (ranged or melee, but not the tanks, unless the tanks are the only players alive), and knocks that player back so the player is 45 yards from Hisek. The player targeted by Aim is stunned for the duration of the Aim cast.

Sonic Resonance fields add more danger to Aim
After five seconds, Hisek will fire a powerful shot at that player, dealing heavy Physical damage that is split evenly amongst all targets in the path of the arrow (1.4M total damage in 10-player raids; 3.5M total damage in 25-player raids). However, taking damage from Aim also creates a field of Sonic Resonance around each affected player, which deals moderate Physical damage to all players within 5 yards of them. This means that if your entire raid just stacks in the Aim path, you will wipe.
In order to handle Aim, players must stand in the path of the projectile, but maintain a 5-yard spread from one another, forming a single-file line. This means you can fit 8 players between Hisek and the Aim target, causing a maximum of 156k Physical damage to each player in 10-player difficulty and 389k Physical damage to each player in 25-player difficulty. Realistically, though, you’re likely to have more success with fewer players maintaining a wider spread to ensure no Sonic Resonance damage is taken (especially in 10-player difficulty where squeezing 80% of your raid between Hisek and the Aim target is really not feasible).
![]() If you have assigned players for Aim soaking, use Regrowth on them before Aim occurs to grant them Living Seeds. Wild Mushroom: Bloom won’t hit them all, so you may wish to Tranq here.
If you have assigned players for Aim soaking, use Regrowth on them before Aim occurs to grant them Living Seeds. Wild Mushroom: Bloom won’t hit them all, so you may wish to Tranq here.
![]() Chi Burst is pretty great for healing up after Aim, since the affected players are going to be in a straight line anyway.
Chi Burst is pretty great for healing up after Aim, since the affected players are going to be in a straight line anyway.
![]() Use Holy Avenger before Aim goes out to get 3-Holy-Power EFs on the designated Aim soakers, and do what you can to stack up their Illuminated Healing in advance.
Use Holy Avenger before Aim goes out to get 3-Holy-Power EFs on the designated Aim soakers, and do what you can to stack up their Illuminated Healing in advance.
![]() Spirit Shell is amazing for Aim, especially in 10-player raids. Watch your boss timers and start Spirit Shelling about 10 seconds before Aim is going to occur (Hisek actually picks a target at the 5-second mark on DBM’s timer).
Spirit Shell is amazing for Aim, especially in 10-player raids. Watch your boss timers and start Spirit Shelling about 10 seconds before Aim is going to occur (Hisek actually picks a target at the 5-second mark on DBM’s timer).
![]() Divine Hymn here and it will hopefully be back up for one of Iyyokuk’s Insane Calculations.
Divine Hymn here and it will hopefully be back up for one of Iyyokuk’s Insane Calculations.
![]() I run Totemic Projection on this fight. Projection + Spirit Link Totem on the players soaking Aim can help. I like to put it close to the bosses so it leeches health from non-soaking melee, then move it to cover the other soakers later.
I run Totemic Projection on this fight. Projection + Spirit Link Totem on the players soaking Aim can help. I like to put it close to the bosses so it leeches health from non-soaking melee, then move it to cover the other soakers later.
Rik’kal the Dissector cannot be tanked by the same tank who is tanking Skeer the Bloodseeker, and it is dangerous to tank-swap these two bosses. Rik’kal grants his tank stacks of Genetic Alteration, which increase damage taken from Skeer by 10% per stack.
Rik’kal will also attempt to cast Injection on his tank. This spell has a 1-second cast time and, if successful, applies one stack of the Injection debuff. Tanks can, and should, avoid this entirely by ensuring they have an active mitigation ability up as Injection is cast. (Death Knight: Blood Shield, Druid: Savage Defense, Monk: Guard or Elusive Brew, Paladin: Shield of the Righteous, Warrior: Shield Block.) Injection casts come every 9 seconds or so, so tanks should be easily able to generate the resources for their active mitigation ability in time for each Injection cast. There is no reason that Injection should ever be applied to the tank.

Amber Parasites spawn when Injection falls off
If a tank misses one of the Injection casts, the debuff deals very light Nature damage every second for 20 seconds, but stacks, and when it wears off it will spawn several Amber Parasites. The number of Parasites spawned does not seem to correlate with the number of stacks; it seems to be 8 Parasites each time in 25-player formats, and presumably fewer – I’d predict 3 – in 10-player formats, but I don’t have confirmation of this yet.
Amber Parasites will fixate on a random player in the raid and attempt to Feed from them, no matter the distance between the Parasite and its target. Feed deals moderate Physical damage every second, but it can be interrupted by conventional interrupts, silence effects, and knockbacks. Every 10 seconds, the Amber Parasites will regenerate, returning to full health. They have very high health, so DPSing the Parasites down is not a viable strategy.
![]() Typhoon and Ursol’s Vortex are both great for interrupting and controlling the Amber Parasites.
Typhoon and Ursol’s Vortex are both great for interrupting and controlling the Amber Parasites.
![]() Capacitor Totem and Wind Shear will allow you to control any Amber Parasites Feeding on you or other players.
Capacitor Totem and Wind Shear will allow you to control any Amber Parasites Feeding on you or other players.

Amber Scorpion, right, eating Amber Parasite
What will kill the Parasites? Well, every 40 seconds, Rik’kal will kindly cast Mutate: Amber Scorpion on random DPS players (3 targets in 25-player format, presumably 1 target in 10-player format). This turns those players into an Amber Scorpion and replaces their abilities with Amber Scorpion abilities. One such ability, Prey, will instantly devour an Amber Scorpion. Prey has a 15-second cooldown, and Amber Scorpion form only lasts 20 seconds, so each Scorpion may consume 2 Parasites. Note that a single set of Scorpions cannot kill all of the Parasites spawned by Injection, so there is still a very strong incentive for tanks to handle the Injection mechanic properly.
If there are no Parasites active, Amber Scorpions can instead use their DPS abilities – Claw, Sting, and Swipe – to damage the Paragons.
Skeer the Bloodseeker and Rik’kal the Dissector cannot be tanked by the same tank, nor can the two tanks swap these targets. Skeer will affect his tank with Hewn, which increases the damage the tank will take from Rik’kal’s abilities by 10% per stack.
Skeer’s only other ability is Bloodletting, which he will use approximately every 40-ish seconds. Bloodletting causes several large Blood adds to form at the extreme edges of the encounter area (2 in 10-player formats, 3 in 25-player formats). Bloods will slowly move toward the Paragons, and if they are allowed to reach a Paragon, they will heal him. The size of the heal is related to the Blood’s remaining health.
Bloodletting summons 2 or 3 Bloods which will heal the Paragons if they reach them
If Bloods are left alone, they will heal any damaged Paragon back to full. Fortunately, they can be slowed and stunned (though not knocked back, rooted, or Death Gripped/Gorefiend’s Grasped). If players cannot kill a Paragon before the Bloods reach him, they should focus on slowing and stunning the Bloods and dealing as much damage to the Bloods as possible.
![]() While Bloods are immune to the knockback portion of Typhoon, the daze/slowing portion will still work.
While Bloods are immune to the knockback portion of Typhoon, the daze/slowing portion will still work.
![]() Crashing Ox Wave will allow you to stun one Blood per wave, helping prevent it from healing a Paragon.
Crashing Ox Wave will allow you to stun one Blood per wave, helping prevent it from healing a Paragon.
![]() Fist of Justice is a great way to halt one Blood before it reaches the Paragons.
Fist of Justice is a great way to halt one Blood before it reaches the Paragons.
.
![]() Totemic Projection and Capacitor Totem or Earthbind Totem are excellent ways of preventing Blood from reaching the Paragons.
Totemic Projection and Capacitor Totem or Earthbind Totem are excellent ways of preventing Blood from reaching the Paragons.

Flash
Ka’roz must be tanked, but does not apply any tank debuffs or use any special abilities specifically on the tank.
About once per minute, Ka’roz will cast Store Kinetic Energy, and afterwards will Flash around the encounter area, moving to the farthest-away targets in a rapid blur. He may do anywhere from 2 to 4 Flashes, but he will always target the next player he will Flash to, so you can predict his path.

Whirling
Players caught in Ka’roz’s path will be affected by Whirling, becoming incapacitated for 5 seconds and taking heavy Physical damage each second. These players can also deal Whirling damage to other nearby players within 5 yards, so when Ka’roz is active, the raid must spread out. It is particularly dangerous when Ka’roz Flashes from one side of the room to the other, passing through melee, as even tanks can be affected by Whirling. It is best if ranged players remain loosely on the same side of the encounter area, so that any possible Flash path between them will not pass through the melee.

Hurl Amber
About every 90 seconds, Ka’roz will Flash to the edges of the room and then leap up onto one of the platforms that ring the encounter area. From here, Ka’roz will Hurl Amber onto the ground below, targeting random players (2 in 10-player format and 3 in 25-player format) and creating a massive puddle of Caustic Amber on the ground. Any player standing in the puddle will take moderate Nature damage each second.
These puddles will eventually fade, but will create annoying constraints for your raid’s positioning and movement. It’s especially annoying when one lands in the melee pile, and doubly so when the priority target is Iyyokuk, Hisek, or Xaril, who stand still and cast and cannot be moved out of the Amber. If for no other reason, this gives your raid a strong incentive to kill Ka’roz before Iyyokuk or Xaril.
About every 25 seconds, Korven will Shield Bash his current tank, incapacitating them for 6 seconds. He will then follow this up with a Vicious Assault, which deals heavy Physical damage to all players in front of him. The Vicious Assault lasts for eight attacks, or approximately the amount of time between Shield Bashes. Immediately following Shield Bash, the other tank should taunt Korven and face him away from both the incapacitated tank and the melee, because an incapacitated tank cannot use any active or passive mitigation/avoidance abilities.
Healers should watch tanks carefully while Korven is active, and be ready to use their external CDs.
![]() Thanks to this and other sources of heavy tank damage, I recommend Clemency and the Glyph of Hand of Sacrifice.
Thanks to this and other sources of heavy tank damage, I recommend Clemency and the Glyph of Hand of Sacrifice.

Encase in Amber
Whenever Korven notices a Paragon falling below 50% health, he will cast Encase in Amber. This creates an Amber shell around the injured Paragon, which begins to cast Amber Regeneration. If the 10-second cast is allowed to finish, that Paragon heals to full health. Players may interrupt the cast by destroying the Amber before the cast bar ends, or by using Ka’roz’s Paragon Power. Note that Encase in Amber has a 30-second cooldown, so once the Amber has gone out it is possible to kill a Paragon before Korven can Encase in Amber again. I’ve made some notes on how to deal with the Amber in my Strategy Summary below.

Blue Sword 3
When Iyyokuk lands, he places a random debuff on each player in the raid. No two players will have the same debuff, and each debuff has three parameters – a colour (Red, Yellow, Green, Blue, or Purple); a shape (Bomb, Drum, Mantid, Staff, or Sword); and a number (1, 2, 3, 4, or 5). These debuffs will become important later – what is most important is that each player should know what debuff they have.

Insane Calculation: Fiery Edge
About every 25 seconds, Iyyokuk will perform an Insane Calculation: Fiery Edge, selecting a random raid member and choosing two of the possible parameters of that player’s debuff (e.g. if the randomly chosen player is Blue Sword 3, he may choose Blue and 3, Sword and 3, or Blue and Sword). Iyyokuk will then draw Fiery Edge lines between the chosen player and two players who share ONE of the two selected parameters.
Again with the Blue Sword 3 example, let’s say Iyyokuk selects Blue and 3; lines could be drawn from the original target to the player with Green Drum 3, or the player with Blue Drum 1. Each connected player will then connect two other players who share one of the two criteria, so Green Drum 3 could link to Yellow Staff 3, and Blue Drum 1 could link to Blue Mantid 4. These players in turn can link to two other players, and so on, until all players who share either Blue or 3 attributes are linked by Fiery Edge.

Fiery Edges
Fiery Edge deals light to moderate Fire damage to the affected players every second, and the amount of damage they take diminishes with distance from the other “endpoints” of the line. Ranged players affected by Fiery Edge should spread out as much as they can to moderate this damage. Similarly, players standing in the path of the Fiery Edge will also take damage.
This is particularly dangerous in the melee pile since it is quite possible that many of the raid’s Fiery Edge lines will pass through the melee; melee DPS and tanks must simply move out of the path of the Fiery Edges as best as they can.
This is a really good time to use spread-healing raid CDs like Tranquility, Healing Tide Totem, Spirit Shell, Divine Hymn, or Devotion Aura.

Diminish
Iyyokuk spams his other ability, Diminish, in between Insane Calculations. Diminish chooses a player at random (tanks exempt) and deals them damage equal to 34% of their current health. If the chosen player is below 25% health, however, Diminish instantly kills them. Healers must be very careful to keep all players above 25% health when Iyyokuk is active, to avoid these insta-deaths.
Xaril and Kil’ruk the Wind-Reaver cannot be tanked together, nor can tanks swap these targets. Xaril will affect his tank with Tenderizing Strikes, increasing damage taken from Kil’ruk by 10% per stack.

Red Toxin/Catalyst
Xaril has another tank ability that is reminiscent of Rik’kal‘s Injection. This ability is called Caustic Blood, and is cast every 8 seconds, generating a stack of Caustic Blood on the tank. Each stack deals moderate Nature damage every second, and if the tank reaches 10 stacks of this debuff, he will experience a Bloody Explosion, dealing fatal Fire damage to the entire raid. This debuff can be prevented entirely by the use of active mitigation abilities, much in the same way Injection is prevented by the Rik’kal tank.

Yellow Toxin/Catalyst
Shortly after Xaril lands, he affects every raid member with a randomly chosen Toxin. The possibilities are Red, Blue, and Yellow Toxins. Healers should track these debuffs on their raid frames. In fact, all players should, but whatever 😉
Xaril will then begin to cast Choose Catalyst, which has a 3-second cast time. Once the spell finishes, Xaril will, well, choose a Red, Yellow, or Blue Catalyst. The Catalyst will react to any player with a Toxin that shares its colour – so a Red Catalyst affects all players with Red Toxin. The reactions are as follows:
![]() Red Toxin/Catalyst: The affected player deals heavy Fire damage to all players within 10 yards.
Red Toxin/Catalyst: The affected player deals heavy Fire damage to all players within 10 yards.
![]() Yellow Toxin/Catalyst: The affected player drops a pool of Noxious Vapors at their feet, dealing moderate Nature damage to players in the Vapors every second.
Yellow Toxin/Catalyst: The affected player drops a pool of Noxious Vapors at their feet, dealing moderate Nature damage to players in the Vapors every second.
![]() Blue Toxin/Catalyst: The affected player detonates, dealing extremely heavy Frost damage that is split between themselves and up to 2 players (10-player raids) or 3 players (25-player raids) within 10 yards.
Blue Toxin/Catalyst: The affected player detonates, dealing extremely heavy Frost damage that is split between themselves and up to 2 players (10-player raids) or 3 players (25-player raids) within 10 yards.

Blue Toxin/Catalyst
Players with Toxins of the same colour should not stack on top of one another. Ideally, when either Red or Yellow Catalyst are chosen, all players with the corresponding Toxin would be well out of range of the rest of the raid, avoiding unnecessary raid damage. However, since Choose Catalyst has only a 3 second cast, and the selected Catalyst is only revealed at the end of this cast, it would be almost impossible for players to react to a Blue Catalyst properly if the entire raid was just spread out.
I suggest some strategies for dealing with this in my Strategy Summary section, but healers should definitely use powerful cooldowns to keep the raid alive through this hectic ability. It is also important to kill Xaril quickly so the raid does not have to deal with more than one Catalyst.
Kaz’tik does not need to be tanked. He deals damage primarily through Sonic Projection, which chooses a random raid member and travels in a path toward them, dealing heavy Physical damage to all players in its path.

Thick Shell – Immune to damage
When Kaz’tik lands, he will summon several Hungry Kunchongs which circle the perimeter of the room. Initially, these Kunchongs are protected by a Thick Shell that prevents them from taking any damage. However, Kaz’tik will periodically Mesmerize a player, forcing them to walk toward one of the Kunchongs. During Mesmerize, the Hungry Kunchong’s Thick Shell is deactivated. Dealing 30% of the Kunchong’s health in damage will interrupt the Mesmerize. Alternatively, the Kunchong will Devour Whole the Mesmerized player if the player is allowed to walk all the way to the Kunchong.
![]() Symbiosis: Leap of Faith will allow you to prolong a Mesmerized player’s path to the Hungry Kunchong, giving the raid more time to break the Mesmerize.
Symbiosis: Leap of Faith will allow you to prolong a Mesmerized player’s path to the Hungry Kunchong, giving the raid more time to break the Mesmerize.
![]() Leap of Faith will allow you to prolong a Mesmerized player’s path to the Hungry Kunchong, giving the raid more time to break the Mesmerize.
Leap of Faith will allow you to prolong a Mesmerized player’s path to the Hungry Kunchong, giving the raid more time to break the Mesmerize.

Mesmerize
Meanwhile, the Hungry Kunchong will begin to Devour the Mesmerized player, dealing moderate Physical damage every second. Each tick of Devour energises the Kunchong by 7 Energy, and when it reaches full Energy – or if it is able to use Devour Whole either on the Mesmerized target or any other player who gets too close – the Kunchong will Molt, becoming a Mature Kunchong. Mature Kunchongs are not tankable, and will attack nearby players with Swipe, dealing extremely heavy Physical damage to any player nearby.
Ranged DPS must switch to the Hungry Kunchongs as soon as their Thick Shell fades. Melee DPS cannot really do this job since getting close to the Kunchongs risks being instantly killed by Devour Whole. While most raids can probably recover from losing someone to Devour Whole this late in the fight, it’s obviously not ideal.
Kil’ruk and Xaril the Poisoned Mind cannot be tanked together, nor can the tanks swap these targets between them. Kil’ruk affects his tank with Exposed Veins, causing the tank to take 10% more damage from Xaril per stack.

Death from Above
Kil’ruk also has a nasty ability, Gouge, which will incapacitate the tank for four seconds. He then immediately follows with Mutilate, a single strike that deals very heavy Physical damage. Kil’ruk can use this combination once every five seconds, so healers will need to keep a careful eye on the tank while this Paragon is alive, and the tank may require external cooldowns.
About every 15 seconds, Kil’ruk will cast Death from Above, choosing a random distant player and leaping to their current location. When he lands, he deals heavy Physical damage to any player within 5 yards of the impact site. Players have a very short time to react and move out of the area of effect, so this is likely to be a source of spiky raid damage. The raid should try to avoid stacking while Kil’ruk is active.
There are four Paragon Powers available to healers, two of which augment your ability to heal and two that grant damage-dealing abilities. I’ll explain these first since it’s a healer guide, but then I’ll note the other powers briefly and where they may be useful.

Calculated Heal Extra Action Button
Iyyokuk the Lucid – Calculated Heal is a healer-specific ability. When activated, it heals your target for somewhere between 135-180k, and also heals all players who share Class or Race with that target. So for example, I healed a Pandaren Shaman with this ability, and it also healed a Draenei Shaman, a Pandaren Hunter, a Pandaren Monk, and a Pandaren Rogue. All targets were healed for the same amount (subject to Class-based healing increases, e.g. Warlocks gain 10% more healing).
Calculated Heal is instant and has a 30-second cooldown. It can Crit, but I do not have enough data to determine whether its heal is affected by your Spell Power or Mastery effects.

Calculated Heal
Frankly, by the time Iyyokuk is dead, there is not that much damage going out on the raid (especially if you are using the kill order I suggest in my Strategy Summary), so this ability is probably best used to heal your tanks. You can do a little bit of raid group Tetris and figure out which player to heal who will hit your tank(s) and the most other players, but if those players aren’t taking damage, it doesn’t really matter, you know?
Xaril the Poisoned Mind – Vast Apothecarial Knowledge is a healer-specific ability. I haven’t gotten to use the ability yet, but it appears to have a 30-second CD, and for the next 10 seconds, all healing you deal creates a Volatile Poultice on the healed targets. The Volatile Poultice “copies” the healing you did, and when the player is next damaged, the Poultice will release that healing in one burst. The Volatile Poultice will last 35 seconds (or thereabouts) if the target does not take damage.
This could be a pretty powerful preventive raid heal for periods of intense raid damage, but by the time Xaril is dead there is not a lot of raid damage to be concerned with – if you’re following my suggested kill order, just one more Insane Calculation from Iyyokuk. This is probably best used to stack massive Volatile Poultices on your tanks in advance of Kil’ruk’s Gouge ability, but on the other hand, your tanks are going to be taking constant damage so the window for stacking Volatile Poultice is pretty short.
Kaz’tik the Manipulator – Master of Puppets may be gained by any player, and allows the player to summon an Immature Kunchong to fight for them for 40 seconds. This has a 1-minute cooldown, and each time the Kunchong is summoned he does approximately 500k damage to the player’s target. The Kunchong has no special abilities other than Molt, a spell that he casts at 100 Energy and that doesn’t seem to do anything; otherwise he just melees the boss.
While there’s no particular reason to give this to a healer, there’s no particular reason not to, either. The damage it deals isn’t going to be revolutionary (especially since it will come so late in the fight, as Kaz’tik lands second-last), but your raid may as well use it to finish off the last few bosses.
Rik’kal the Dissector – Mad Scientist may be gained by any player, and allows the player to transform into an Amber Scorpion. The transformation lasts for 30 seconds and is similar in nature to the Mutate: Amber Scorpion ability that Rik’kal uses on your raid while he is alive. The player mutated into an Amber Scorpion suffers a moderate amount of Nature damage each second, and only has access to Scorpion abilities:
- Sting places a poison on the target that deals moderate Nature damage every second
- Claw deals moderate Physical damage to the player’s target
- Swipe deals heavy Physical damage to targets in front of the player, and deals triple damage to enemies affected by Sting.
One player whose logs I perused dealt 245k DPS while mutated into an Amber Scorpion via Mad Scientist, and outside of that time, dealt 212k DPS. I can’t make any claim to that player using the Mad Scientist buff skilfully, because it was just a random log I found, but it would seem that lower-DPS players may benefit from the Mad Scientist buff more than higher-DPS players. If your DPS is already higher than what you can do as a Scorpion there doesn’t seem to be much incentive to be a Scorpion, except that it looks cool.
I will note that the Agility DPS meta gem and legendary cloak proc effects do not deal any damage whilst the player is mutated. Capacitance will stack and then fall off without dealing any damage during this time; Flurry of Xuen can proc but will deal no damage.
I do not recommend giving this buff to a healer, since using the buff means they cannot heal for the next 30 seconds.
The powers that cannot be obtained by healers are as follows:
Hisek the Swarmkeeper – Compound Eye is an ability only available to damage-dealers. It allows the player to Snipe an enemy target, dealing more damage the farther away the target is. Snipe has a four-second cast time and seems to max out at 260,000 damage. Snipe also leaves Marked for Death on the enemy target, increasing all damage taken by 15% for 10 seconds.
This is a great ability to use on the Paragon who is your current priority target, but for the short-term burst damage that is required to defeat, for example, Amber or Hungry Kunchongs, this is less than ideal. Most DPS can deal more than 260,000 damage in 4 seconds, so the only benefit is the 15% increased damage from the other DPS in your raid, which you won’t be able to take full advantage of given the short duration of these time-critical targets.
Ka’roz the Locust – Strong Legs is an ability that is only available to damage-dealers. It allows the player to leap up to one of the platforms from which the Klaxxi assault the raid, pick up a piece of amber, and hurl that amber down onto the ground, dealing 300,000 Nature damage to all enemies within 15 yards. The amber explosion will also break any active Amber that Korven the Prime is using to heal his allies. If you kill Ka’roz before Korven, then you can use this ability to break the Amber that Korven places on himself. This is handy if your raid can’t kill the Amber on their own.
But, if you are following my kill strategy, you won’t be killing Ka’roz before Korven, so this is not terribly useful. It takes one player out of the encounter for several seconds in order to deal 300k splash damage to the enemies; that player undoubtedly could have dealt more damage by staying in the fight, and could have dealt it to the priority target instead of useless cleave. This can be useful for situations where there are a large number of adds, but that shouldn’t arise if you are executing the mechanics properly.
Kil’ruk the Wind-Reaver – Reave is only available to players in the damage-dealing role. It allows the player to leap forward a short distance, dealing Physical damage to all enemies within 10 yards of the impact point. If one of those enemies is a Hungry Kunchong with a Thick Shell active, Reave will remove that Thick Shell, allowing players to kill the Hungry Kunchong before Kaz’tik commands it to Mesmerize another player.
However, Kil’ruk is the final boss to land (and my choice for the final boss to kill), so this ability will not see much use. It could be used against Hungry Kunchongs if you leave Kaz’tik ’til last, but you’ll still have to deal with several Hungry Kunchongs without this Reave ability anyway, and it’s much safer just to kill Kaz’tik faster.
Korven the Prime – Master of Amber is a tank-specific ability. The tank may use this ability to place a protective shell of Amber on any player, making them immune to damage for 5 seconds. This could be used to save a player who has taken Whirling damage, or a player with Blue Toxin who couldn’t get stacked up during Blue Catalyst, or players who are approaching a Hungry Kunchong under the effects of Mesmerize.
Skeer the Bloodseeker – Bloodthirsty is an ability specific to players in a damage-dealing role. This grants the player access to a new spell called Bloodletting, which for the next 10 seconds will give that player’s attacks a chance to summon blood orbs. These blood orbs persist for 30 seconds and will heal any player who walks through them for 10% of that player’s maximum health.

Bloodthirsty Orbs: look like enemy monk-balls, but healthier!
This is probably best given to a melee DPS, a fast-attacking Monk or Feral Druid ideally, and used in advance of abilities that are dangerous to the melee like Insane Calculation or Whirling.
The kill order I prefer is:
- Hisek the Swarmkeeper
- Skeer the Bloodseeker
- Korven the Prime
- Ka’roz the Locust
- Xaril the Poisoned Mind
- Iyyokuk the Lucid
- Kaz’tik the Manipulator
- Rik’kal the Dissector
- Kil’ruk the Wind-Reaver
Hisek’s Aim is by far the scariest mechanic of the encounter, and killing him quickly under the effects of Bloodlust/Heroism and everyone’s DPS cooldowns often means you won’t see a single Aim. Skeer summons the Bloods that heal, so he’s my second choice, and Korven also heals so he’s my third. From there, the rest of the kill order is pretty fluid, and the only thing of note is that I find Xaril to be more dangerous than Iyyokuk, since many raids won’t have the organisation or reaction times to deal easily with his Toxin/Catalyst mechanics, while at least the results of Iyyokuk’s Insane Calculation are more intuitive.
Yes, this strategy keeps Rik’kal alive from the start of the fight until the very end, which I suggest because half of his mechanics are completely negated by your tanks keeping their Active Mitigation abilities up, so he kinda does nothing but occasionally turn your raid members into scorpions that can deal damage. However, with this strategy the tank must be able to handle up to 70% additional damage that Rik’kal will deal thanks to the Paragon’s Purpose buff he receives each time another Paragon dies. If your raid is having difficulty with tank survivability, or if your tanks aren’t able to avoid the Injection/Parasite-summoning mechanic, you may wish to reconsider this order, and kill Rikkal before Skeer.
No matter what kill order you use, the first “phase” of the fight is identical. You’re faced with Aim, Injection and Mutate: Amber Scorpion, and Bloodletting. Of these, Aim is the most dangerous. Be sure to keep your raid in the same general area in case Hisek gets an Aim (or two) off before you kill him. If your raid’s DPS is strong enough, consider blowing Heroism at the start and burning Hisek down before he gets an Aim off. Stun and/or slow Skeer’s Blood adds while you’re killing Hisek, and then let the Blood hit the bosses before you start working on the next Paragon.
Since the other two Paragons will heal up to full either way, there’s no reason to expend extra DPS on these Blood adds unless you legitimately cannot kill the boss before the Bloods reach him. (If your raid’s DPS is really strong, you can do this again for the second Paragon you kill, although you may also need to drag the boss away from the nearest Blood to finish him off before the Blood heals him.) If you can’t kill a boss before the Bloods hit, and your raid is using all the slows and stuns they have available to them, then players will need to switch to the Bloods and kill them quickly. If this is still not working, then you may wish to kill Skeer first – get him as low as possible, then do as much damage to the Bloods as you can to reduce the amount of healing he takes, and repeat until he’s dead.
There are three ways to deal with Korven the Prime’s Encase in Amber ability. The simplest method is to destroy the Amber within the 10 seconds it takes to heal its target, which requires your raid to execute a quick target-switch.
If your raid’s DPS is not strong enough to achieve this, you can alternately cleave both Korven and another target down to around 52%, then push the other target below 50%, triggering Korven’s Amber on that other target, pop Bloodlust/Heroism and other cooldowns, and finish Korven off during the 30-second Amber cooldown. This will allow the other target to heal back to full from the Amber, but he was going to heal back to full when you killed Korven anyway, so in either case, that damage was only useful to “place” the Amber where you want it.
The third method is to kill Ka’roz first and use his Strong Legs ability to destroy Ambers. If the designated Strong-Legs-user has a good handle on this, you can keep Korven up for a long time and just have the Ambers continually broken. However, this is a slightly risky strategy since any mishaps with the Amber-throwing – jumping up to a platform with no Amber chunks, for example, or being unable to aim and throw the Amber in the brief time allotted – will allow the Paragon who is Encased in Amber to heal back to full, prolonging the fight.
Once Ka’roz the Locust has landed, the raid will need to spread out for his Flash and Hurl Amber abilities. The raid should then stay spread out for the rest of the fight, with the exceptions of select raid members stacking to deal with Xaril’s Blue Catalyst ability, and the whole raid moving away from Hungry Kunchongs so that Mesmerize has the longest possible path.
To deal with Xaril’s Toxin/Catalyst interactions, the best strategy in 10-player mode is to have every Yellow Toxin player pair up with a Blue Toxin player; that way, if Xaril throws out a Blue Catalyst, the damage can be shared between the two players and both should survive. The Yellow/Blue pairs should be spread out from one another so they do not overlap. This does run the risk of Yellow Catalyst causing two players to be caught in each Noxious Vapour puddle, but since Noxious Vapour deals its damage periodically, this will result in far less raid damage – and will be far more survivable – than in trying to ad hoc organise your Blue Catalyst groups. Players with Red Toxin should simply be certain to stay more than 10 yards away from other players in case Red Catalyst is chosen.
In 25-player mode, you could make distinct groups of R/Y/B to cut down on the Blue Catalyst damage; in this scenario, Red Catalyst or Blue Catalyst will both deal 400k damage to the three players, and each group will have to move quickly out of Yellow Catalyst pools. This will leave one odd player out, which ideally would be a Yellow or Red Toxin player, who is fine to just stand off on their own somewhere; if the leftover player has Blue Toxin, try to ensure it is a player with a personal immunity cooldown they can use to avoid the Blue Catalyst damage.
Given how annoying Mesmerize is, by the way, killing Kaz’tik the Manipulator is a great time to re-use your raid’s long DPS CDs (like Stormlash Totem and Skull Banner). If you used them at the start, they’re probably back up by the time you’re working on the seventh boss in the kill order.
You will need cooldowns for: Aim, Insane Calculation, Red or Blue Catalyst, any Bloody Explosion, Gouge (tank CD), and Shield Bash (tank CD)
Dispels: None
Debuffs to track: Aim; Gene Splice; Mesmerize; Mutate; Toxin: Red, Toxin: Yellow, and Toxin: Blue; Whirling; and the tank debuffs Caustic Blood, Gouge, and Shield Bash
Points of failure:
So, so many. Here goes:
- A tank dies due to tanking Paragon A, who buffs Paragon B’s damage, with Paragon B, who buffs Paragon A’s damage (e.g. Skeer and Rik’kal; Xaril and Kil’ruk);
- Your Rik’kal tank cannot keep their Active Mitigation up for Injection, and your raid becomes overrun with Parasites;
- Your Xaril tank cannot keep their Active Mitigation up for Caustic Blood, and your raid takes heavy Bloody Explosion damage (particularly in conjunction with Toxins or Insane Calculation);
- Your raid does not handle Aim appropriately, either by failing to soak it and losing the 1 or 2 players in its path, or by packing too many players in its path and dying to splash damage;
- The raid does not deal with Skeer’s Blood adds, allowing your kill target to heal and prolonging the fight;
- The raid stands in Ka’roz’s Hurl Amber patches, or allows too many players to be struck by Flash and affected by Whirling, and healers cannot keep up with the damage;
- Your melee DPS stand in the cleave effect from Korven’s Shield Bash/Vicious Assault;
- Tanks do not have a cooldown or taunt available for Korven’s Vicious Assault, and die;
- The raid does not handle Korven’s Encase in Amber mechanic properly, prolonging the fight;
- Players chosen by Iyyokuk’s Insane Calculation do not spread out to lessen Fiery Edge damage, or melee do not move out of the path of Fiery Edge, or your healers cannot keep up with Fiery Edge damage;
- The raid does not appropriately react to Xaril’s Catalyst – specifically Red or Blue – and takes unhealable raid damage;
- Players are unable to defeat Hungry Kunchongs before the Mesmerize target is consumed, or melee players rush to the Hungry Kunchong and get Devoured Whole;
- Tanks do not have a cooldown or taunt available to deal with Kil’ruk’s Gouge/Mutilate combo, and die;
- Players do not move out of Kil’ruk’s Death from Above;
- The raid does not defeat the Paragons before they Berserk (which was a 12-minute restriction on PTR LFR difficulty; I cannot find current Berserk timer information).
Good luck, everyone! I know this page makes the fight look incredibly daunting, but remember that you don’t have to deal with all of these mechanics at once, and once you have the most dangerous Klaxxi dead, you can breathe easy 🙂
Again, I’d like to welcome anyone who reads this to post their opinion (and ideally, reasoning!) on the kill order for this fight, since I know that the encounter must vary dramatically based on format (10-player vs. 25-player) and raid composition.

Pingback: SoO You Think You Can Heal: Siegecrafter Blackfuse | healiocentric
Pingback: SoO You Think You Can Heal: Thok the Bloodthirsty | healiocentric
Pingback: SoO You Think You Can Heal: Spoils of Pandaria | healiocentric
Pingback: SoO You Think You Can Heal: Malkorok | healiocentric
Pingback: SoO You Think You Can Heal: General Nazgrim | healiocentric
Pingback: SoO You Think You Can Heal: Kor’kron Dark Shaman | healiocentric
Pingback: SoO You Think You Can Heal: Iron Juggernaut | healiocentric
Pingback: SoO You Think You Can Heal: Galakras | healiocentric
Pingback: SoO You Think You Can Heal: Sha of Pride | healiocentric
Pingback: SoO You Think You Can Heal: Norushen | healiocentric
Pingback: SoO You Think You Can Heal: The Fallen Protectors | healiocentric
Pingback: SoO You Think You Can Heal: Immerseus | healiocentric
*head explodes*
we only use a slightly different order, but a couple of the changes are big jumps. this is 10m, so that probably changes things.
1) Rikkal – we run DK/monk. the monk complained that keeping up his AM (at least the one that counts) was a huge PITA and sometimes not possible. the DK was usually ok, but he would occasionally get hit with a cleave or something that would eat his blood shield just before the injection. and the stupid parasites are just wasted dps, so we kill him first.
2) skeer
3) korven
4) karoz
5) Hisek – on 10m at least, AIM is really easy to deal with. you only need 3 players minimum, so if you count 1 melee and the targeted person, really only 1-2 more people need to move.
6) xaril
7) kaztik – hates me some kunchongs. not only do they waste dps, one of those little bastards wandered over and chomped me once.
8) iyyokuk – just because he has more stacks than kilruk. the edge damage is really light when spread out properly, which is simple on 10m.
9) kilruk, but he could also be #8 because the gouge is annoying.
Thanks Hoofdee, this is great! 🙂
Oh I just wanted to add: My Guardian Druid bf was completely unaware of the Injection mechanic since it is almost impossible for him to *not* have Savage Defense up. Similarly in my main raid, our Warrior tank is able to keep his Shield Block up with ease. I dunno if it would be easy or difficult with a Paladin tank since their SotR only last 3 seconds IIRC. I think in this case, each raid’s composition might make the strategy different.
I am surprised your group is able to handle Aim so adroitly. When I watch my bf’s 10-man raid they leave Hisek alive a long time but really seem to struggle with the mechanic. (I have suggested this strat to him but he is not in charge :-P)
One of the reasons I love this fight is how flexible it is. I really like when there is more than one valid way to defeat a fight, and this encounter definitely fits that description! 🙂
there is one thing that’s bad about our order: karoz + hisek is an annoying combination because the AIM’ed person cannot avoid the charge.
Maybe that is what’s happening to my bf’s raid, too. It just looks so awful when Aim goes out!
This is the exact order we use too. (10M also).
Aim is just not a problem, like, ever. I think we’ve only wiped once and that was a couple of new people not knowing what to do with the Insane Calculation and they fried each other.
This fight just seemed really, really easy compared to Thok and Siegecrafter. *shrug*
Pingback: SoO You Think You Can Heal: Garrosh Hellscream | healiocentric
In 10 Man (normal at least we weren’t getting fully stunned, just knocked back and rooted) certain classes can tank the AIM alone to avoid the raid taking additional damage. I will typically use zen meditation on the first AIM I get then yell at my raid not to stand in it which saves us a lot of healing.
Hey, that is a pretty handy trick! I was sure I was locked out of abilities last time it happened to me but I will have to try this out in LFR or Flex. Thanks! 🙂
Pingback: Discipline Priest Raiding Tips | Welcome to Azeroth Underground